1. Select your model provider
When you log in to Devic, the first step is to choose the model provider that will run your agents and assistants. In the top bar, you’ll find the model selector, with support for the following providers:- OpenAI
- DeepSeek
- Anthropic
- XAi
- Kimi-K2
Provider configuration
Click the settings icon next to the provider name to authenticate using your API key.
Provider authentication
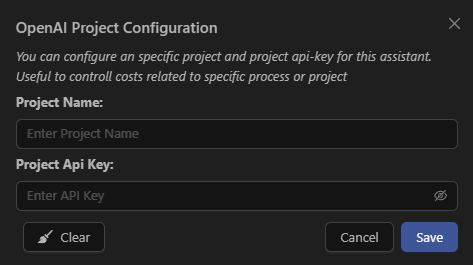
Before creating or running agents, you must authenticate your account using the API Key of the selected model.This step is mandatory: the platform will not allow you to proceed until authentication is completed successfully. In the configuration window, enter:
- Project Name: an identifier for your project or environment.
- Project API Key: the API key issued by the model provider.
- How to generate an API Key in OpenAI
- How to generate an API Key in Anthropic
- How to generate an API Key in DeepSeek
- How to generate an API Key in XAi
- How to generate an API Key in Kimi-K2
2. Dashboard
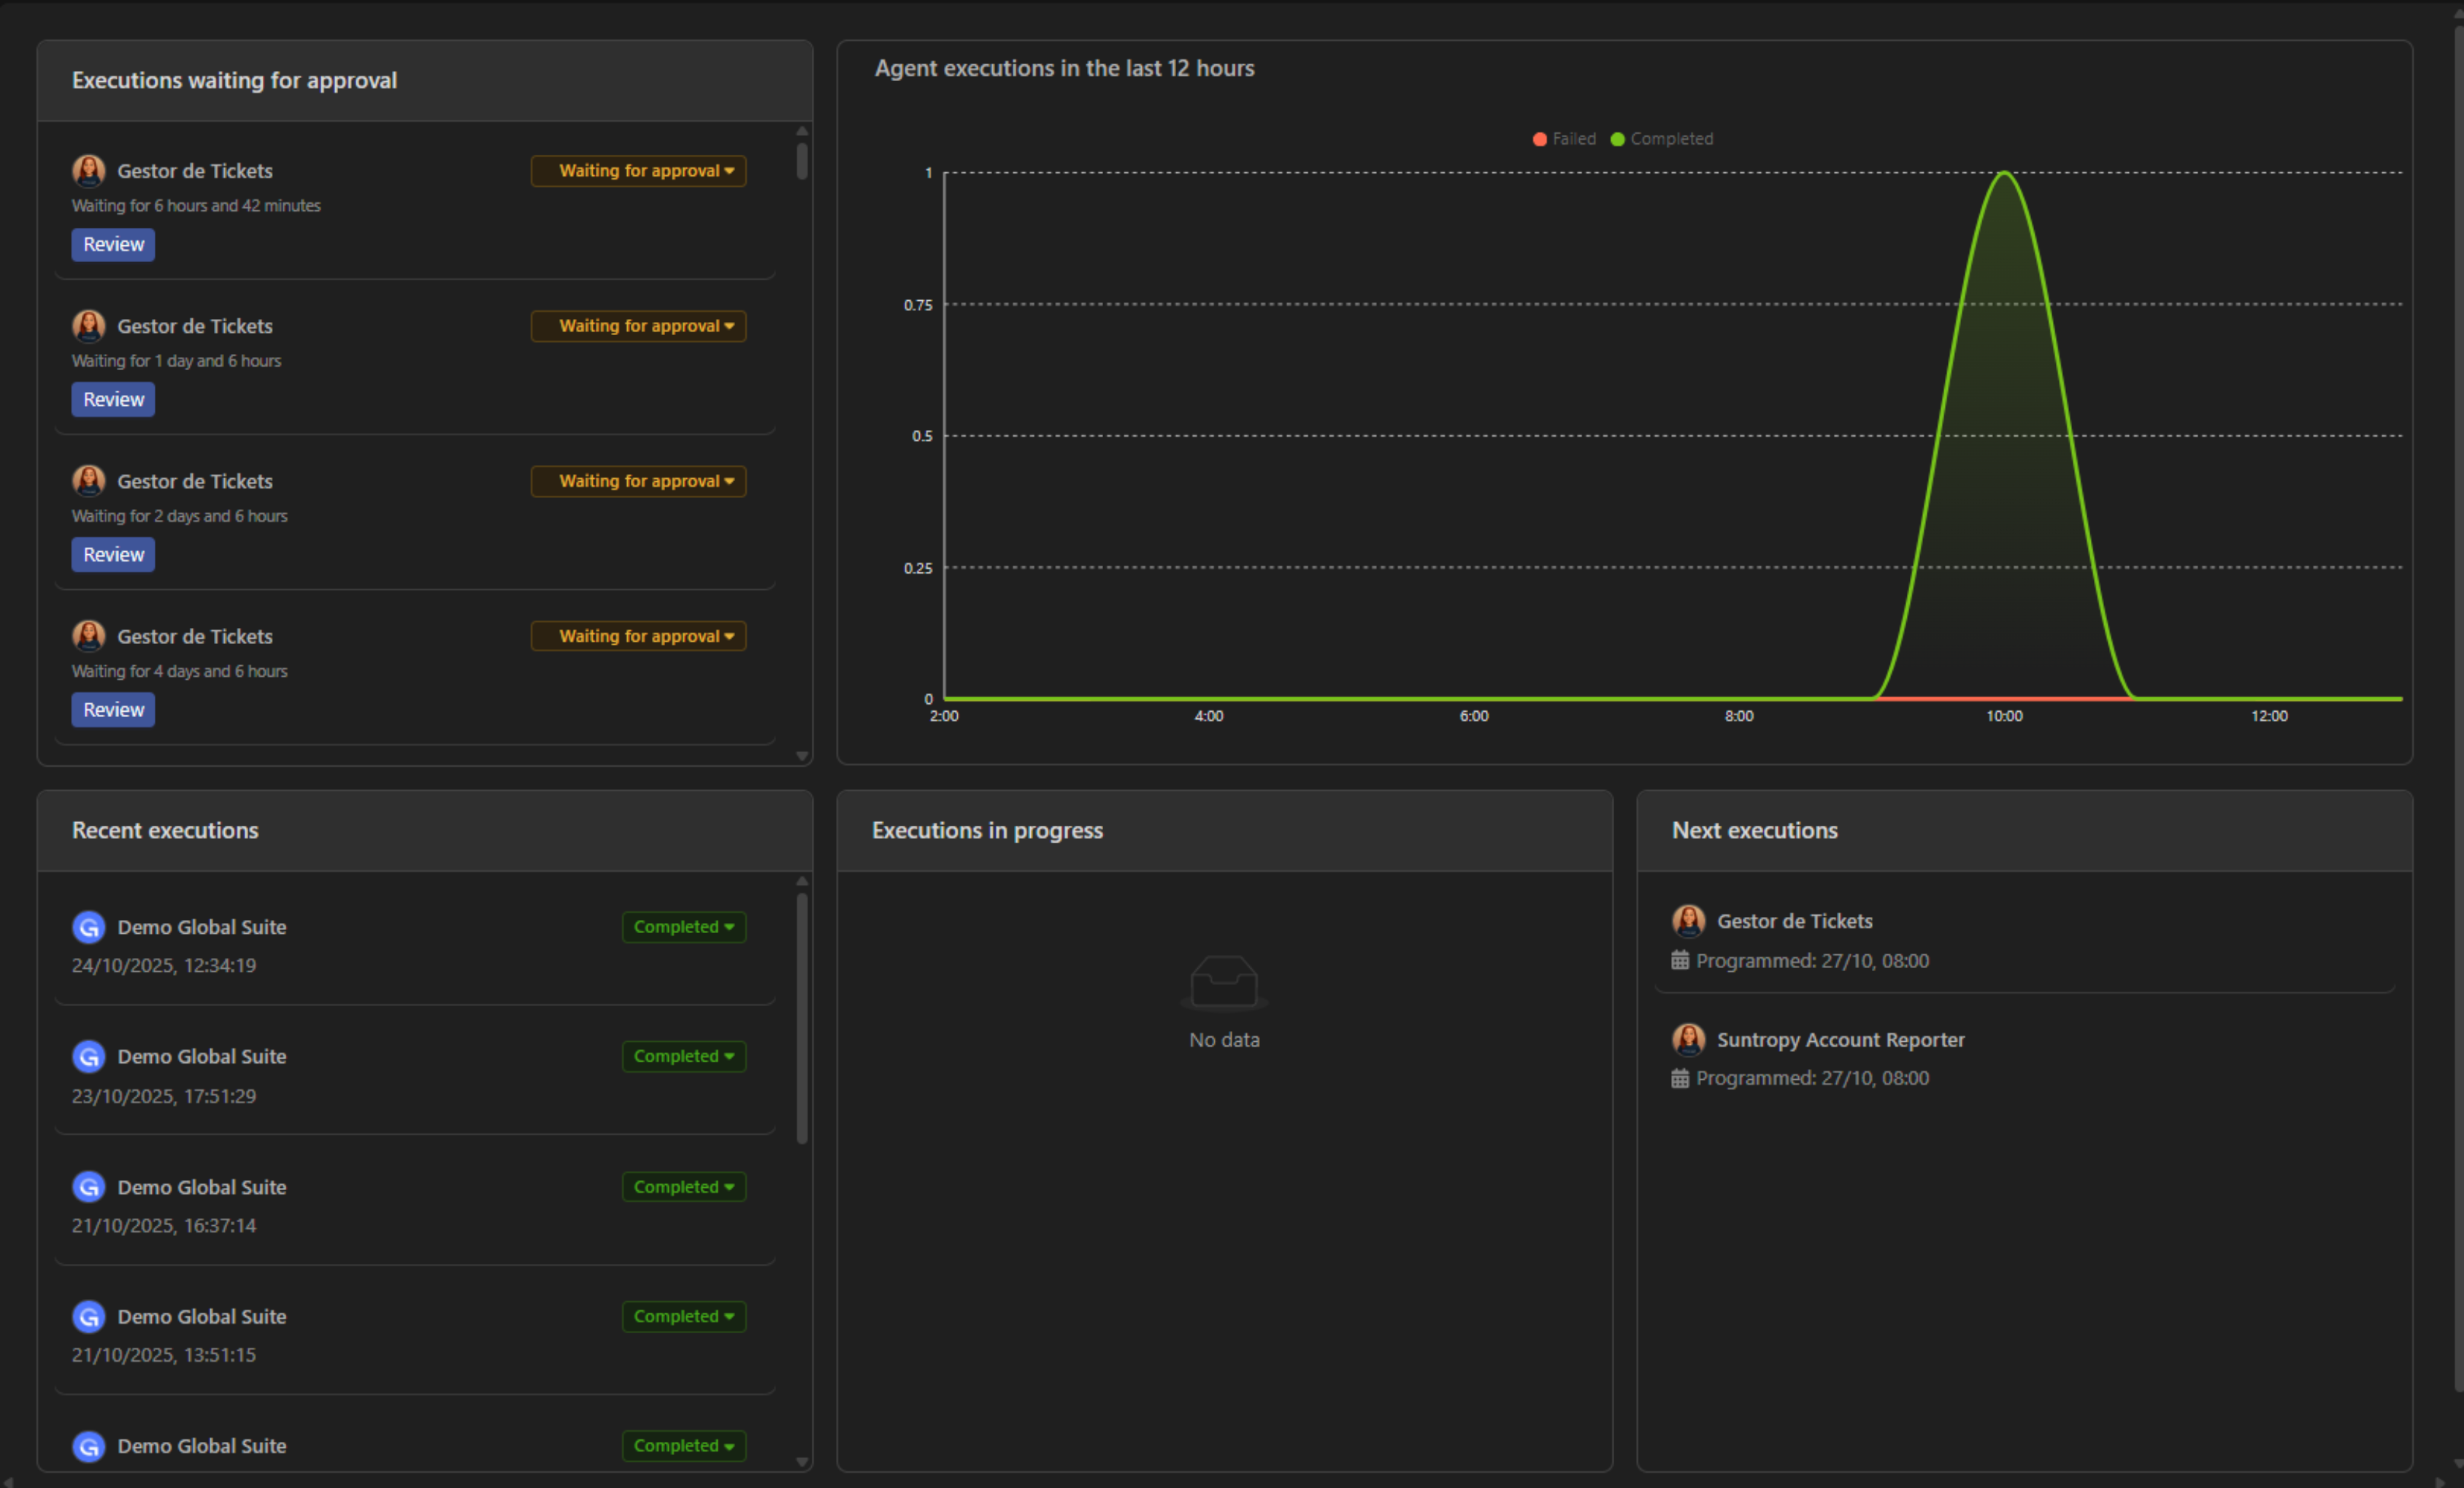
The Dashboard is the central control point of Devic.Here you can monitor agent performance and the status of executions in real time.
Executions pending approval
Displays tasks paused under the Human-in-the-Loop workflow that require manual approval before continuing.
Recent executions
List of completed or ongoing executions, including date, status, and the agent involved.
Executions in progress
Shows which agents are active and the tasks currently being executed.
Upcoming executions
Schedule of agents configured for automatic execution.
Performance charts
Real-time metrics for agents executed in the last 12 hours.
3. Main areas
The left sidebar groups all functional sections of Devic.From here you can access each main module to configure, monitor, and operate your AI-native environment.
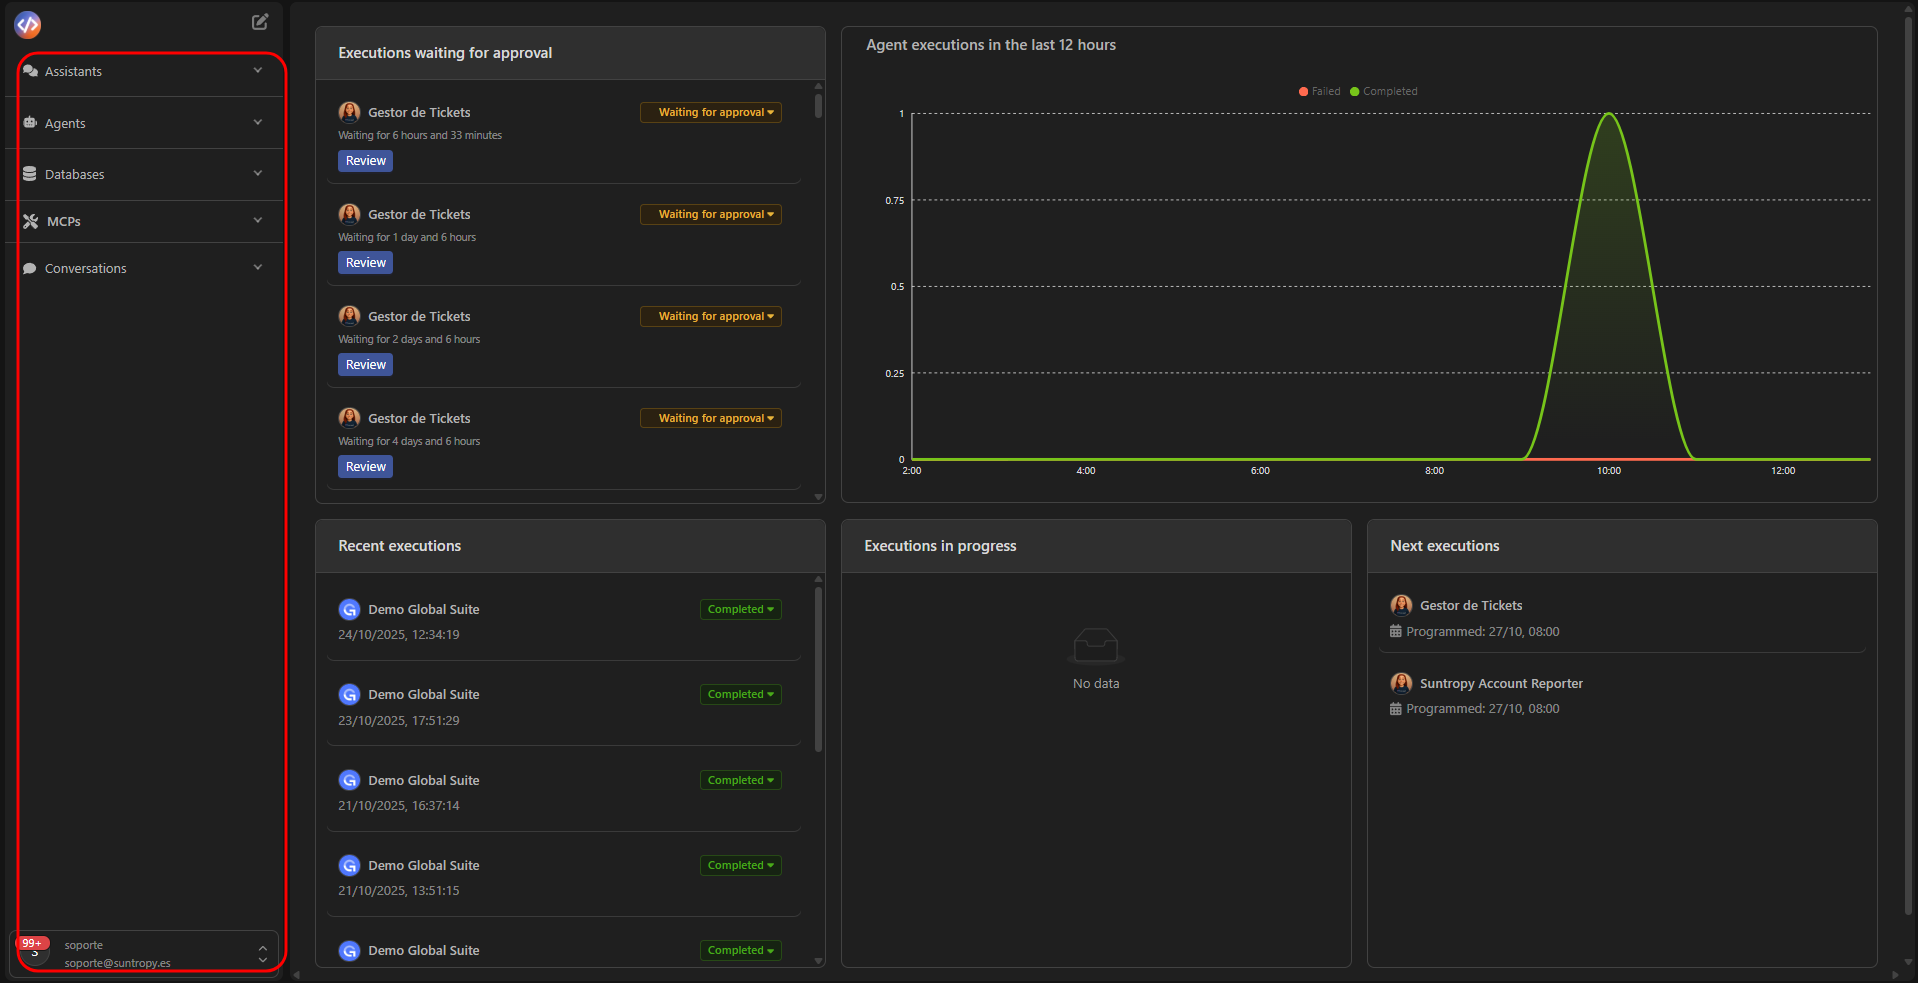
Assistants
Conversational interfaces that respond in real time. You can connect them to your data or integrate them into your products.
Agents
Autonomous entities that execute business workflows, invoke tools (MCPs), and manage complex tasks.
Databases
Vector databases with integrated semantic search, available for your agents and MCPs.
MCPs
Tools and connectors that extend your agents’ capabilities using the Model Context Protocol standard.
Next step
Create your first MCP and start giving your agents the tools they need.