Overview
Each database in Devic includes a dedicated view where you can browse, filter, and modify records in real time.This interface centralizes all stored information and allows you to maintain data consistency without leaving the platform.
Main Navigation
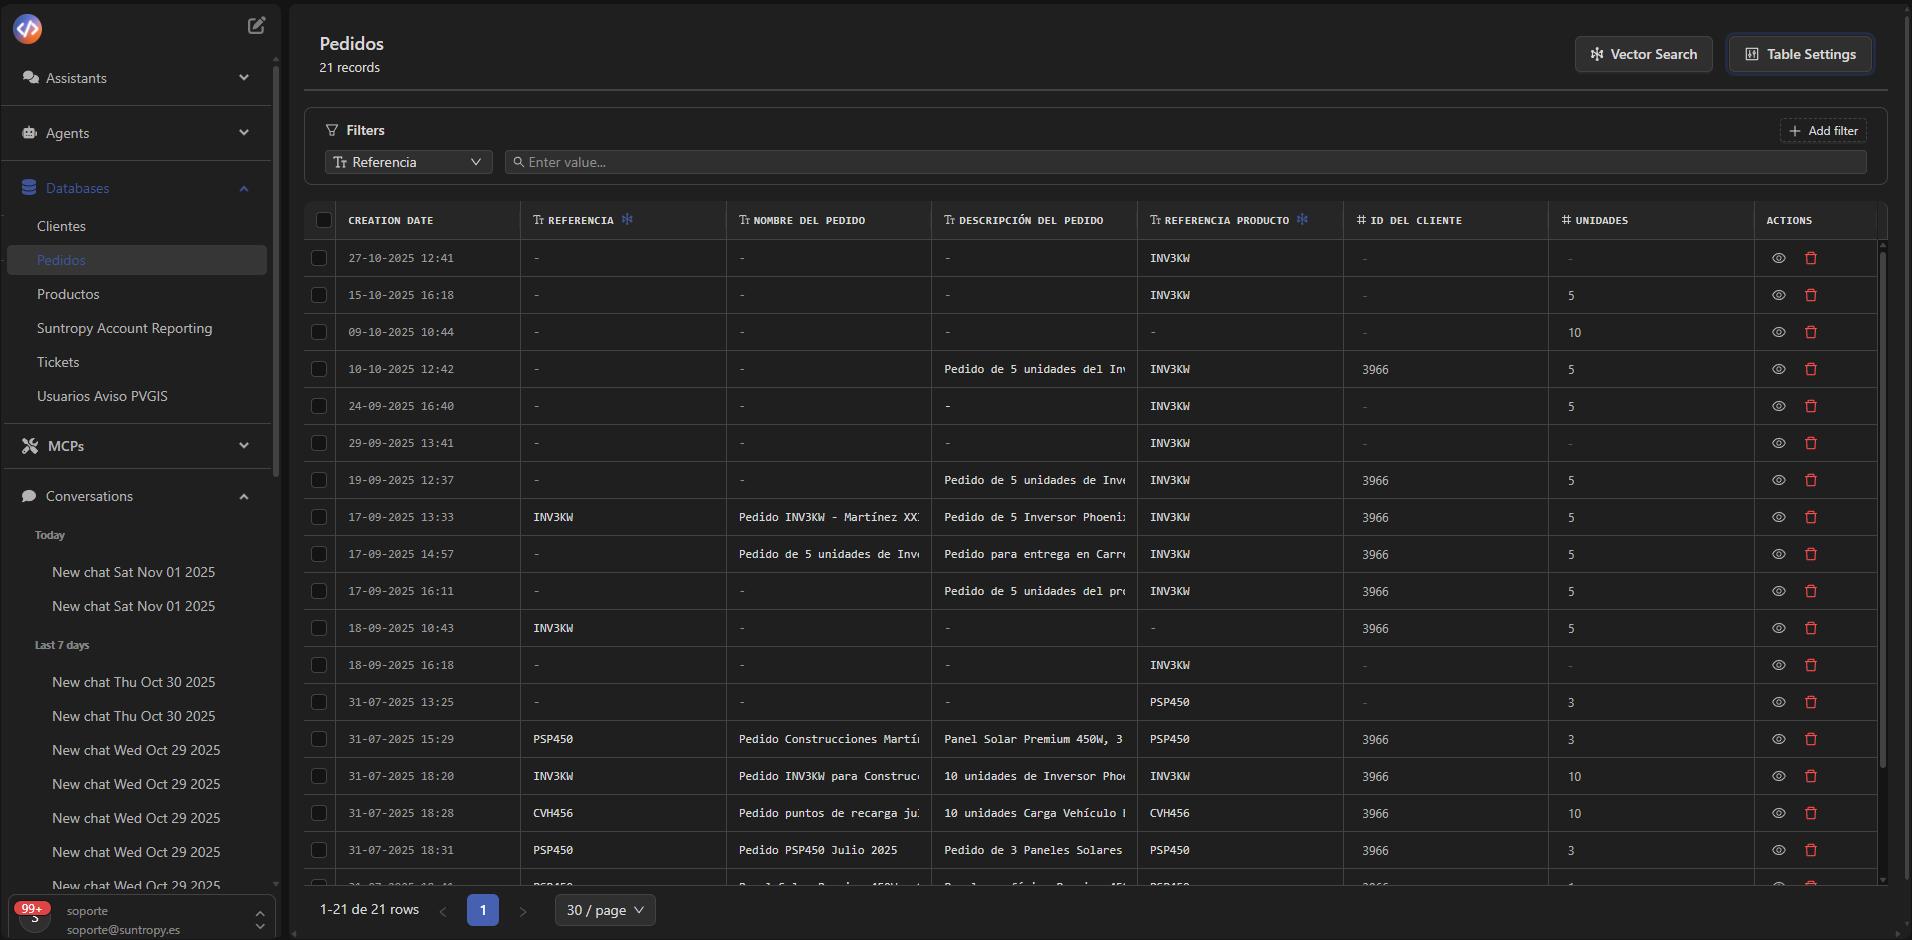
When accessing a database, you will see a table containing all available records.At the top, several key tools are displayed:
- Vector Search: perform semantic searches based on meaning instead of exact matches.
- Table Settings: opens the side configuration panel for the database (structure, fields, colors, etc.).
Filters and Advanced Search
Use the Filters module to narrow down the displayed information:- Select a field from the dropdown menu (for example, Reference or Client ID).
- Enter the value you want to search for.
- Add multiple filters at once using the Add another filter button.

Semantic Search (Vector Search)
The Vector Search engine allows you to run natural language queries across custom fields.It is ideal for context-based or meaning-based searches.
- Click Vector Search.
- Type your query, for example:
- The platform will interpret the intent and return the most relevant results based on the record content.
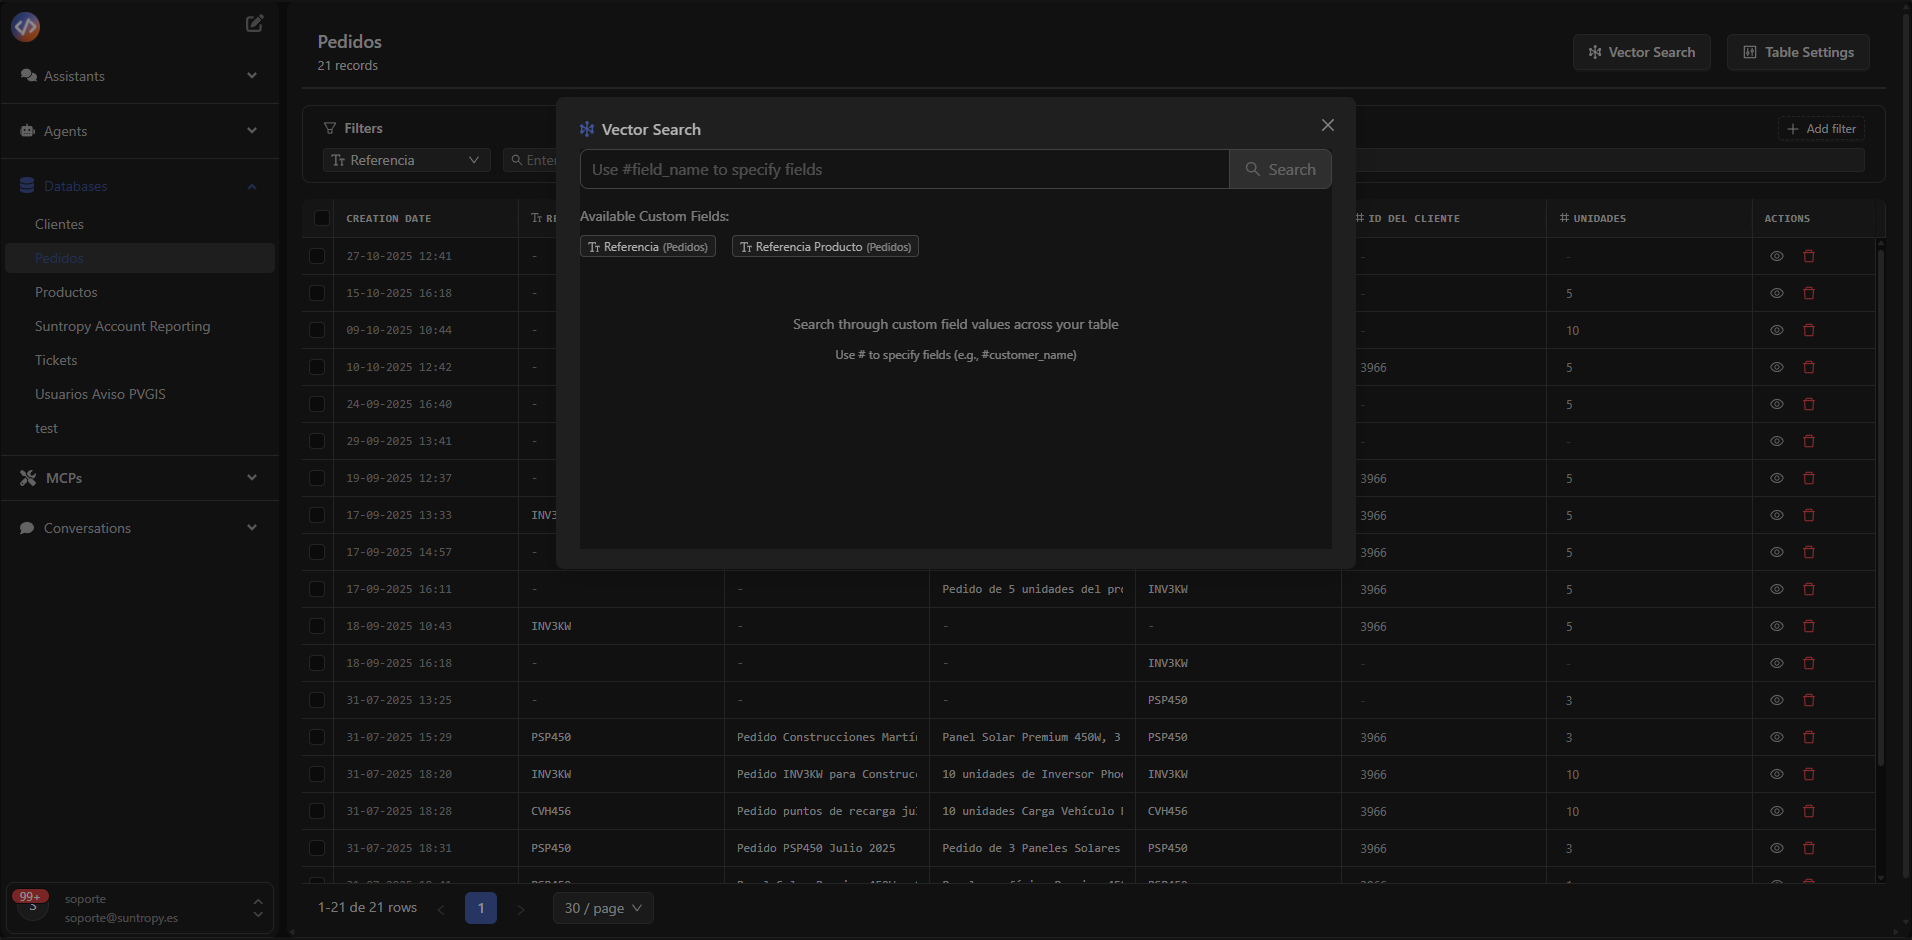
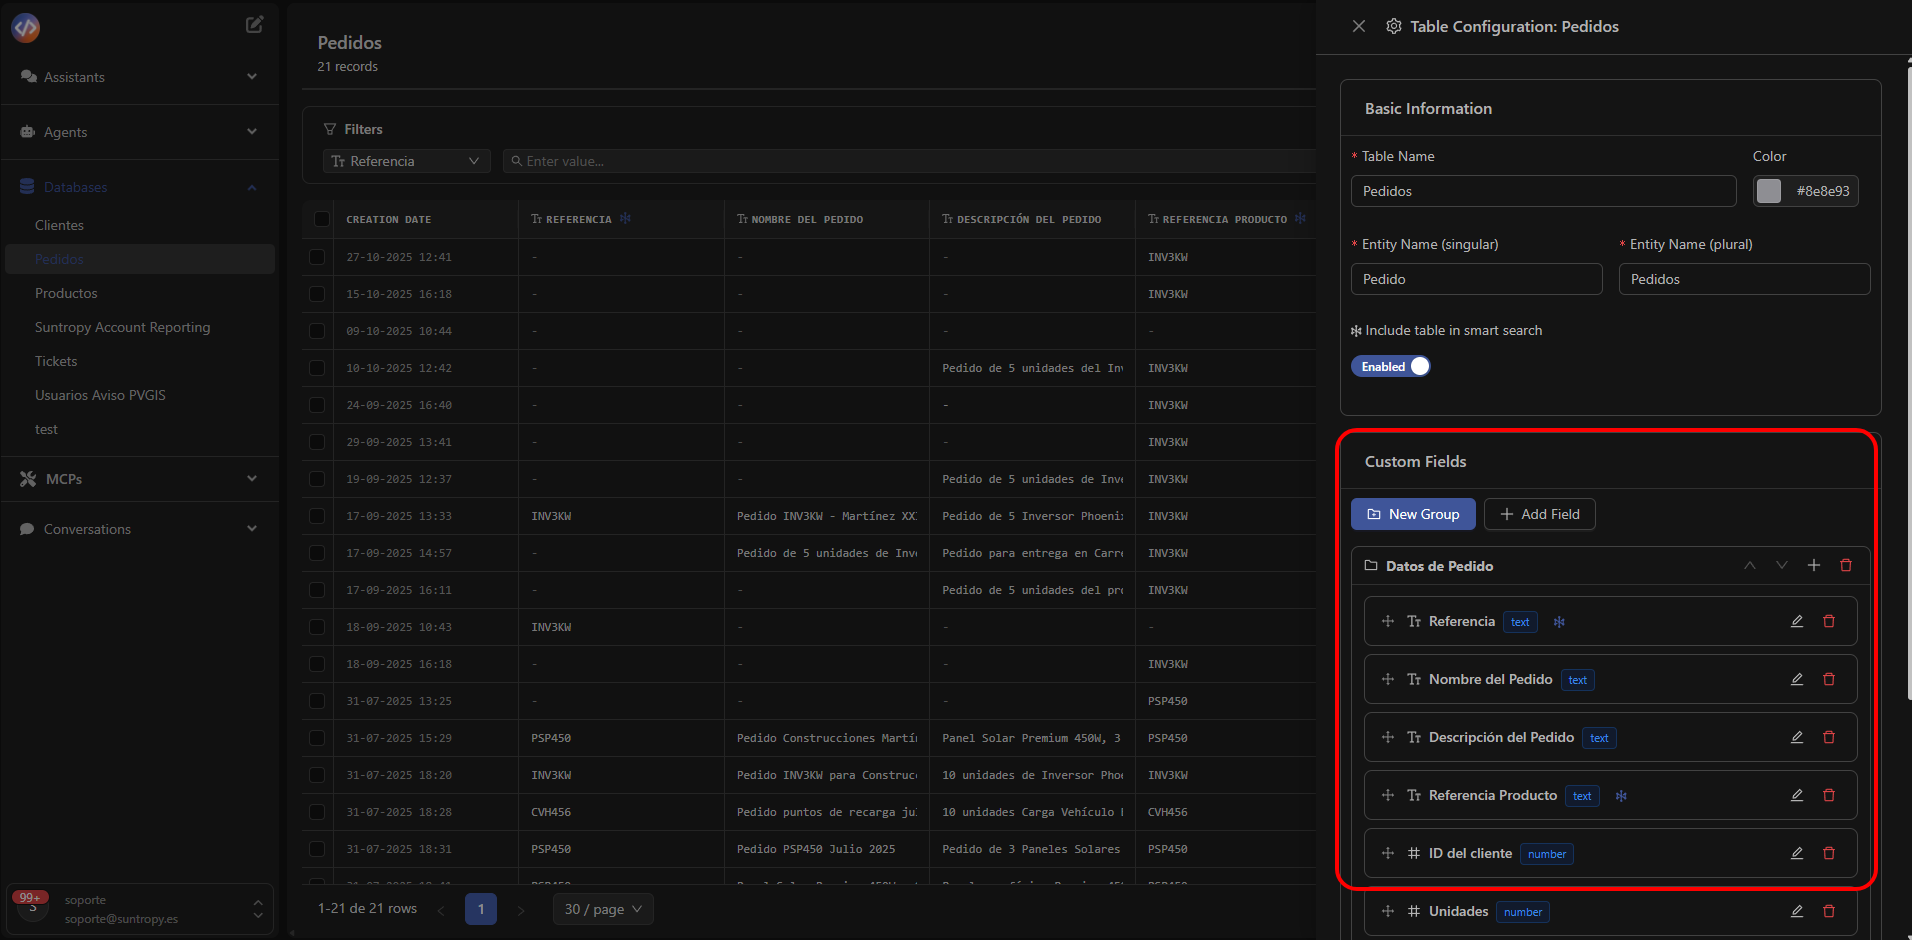
Table Configuration
The side configuration panel — called Table Settings — lets you modify the structure or behavior of the database:- Table Name & Color: adjust the database’s name and identifying color.
- Entity Name (singular/plural): edit entity names.
- Include table in smart search: enable or disable inclusion in global semantic search.
- Custom Fields: add, edit, or group existing fields.

Custom Fields
The Custom Fields section defines the internal structure of the database.You can group fields and add as many as needed depending on the type of information you will manage.
- New Group: create a group to organize fields by category (e.g., General Data, Tax Information, etc.).
- Add Field: add a new field inside the selected group.
- Field name
- Data type (e.g., text, number, date, boolean, etc.)
- Quick actions to edit ✏️ or delete 🗑️ the field.
Next Steps
Quickstart
Set up your environment and launch your first agents or assistants in minutes with the quickstart guide.
Agents
Learn how to build and automate intelligent processes through autonomous agents in Devic.
Assistants
Discover how to create conversational assistants with access to your data and tools.
MCPs
Explore how to build and connect your own custom tools using the MCP standard.