> ## Documentation Index
> Fetch the complete documentation index at: https://docs.devic.ai/llms.txt
> Use this file to discover all available pages before exploring further.
# Deploy Your First Assistant
> Step-by-step guide to creating and configuring your first assistant in Devic: model, prompt, tools, and knowledge.
**Assistants** are the most direct way to interact with models inside **Devic**.\
Unlike agents —which operate autonomously until completing a process— assistants are designed to **respond in real time** to user queries, combining reasoning, tools, and knowledge.
In this guide, you’ll learn how to create your first assistant and configure the components that make it functional: the **model (LLM)**, **prompt**, **tools**, and **RAG (knowledge)**.
***
## What Is an Assistant in Devic?
An assistant is a conversational entity that **responds directly to the user** inside the platform or through connected channels.\
It can reason, consult knowledge sources, execute actions via tools, and maintain conversation context within a thread.
Each assistant combines:
* A **language model (LLM)** that interprets and generates responses.
* A **prompt** that defines its role, tone, and limits.
* A set of **tools** that allow it to perform specific actions.
* A **RAG space** where it stores documentation or reference information.
***
## Step 1: Create a New Assistant
From the Devic sidebar, open the **Assistants** section and select **+ Custom**.\
Assign a **name** and **description** that clearly represent its purpose.
| Field | Description |
| --------------- | ---------------------------------------------------------------------------------------------------------- |
| **Name** | Main identifier of the assistant. Use a representative name like *Technical Support* or *Sales Assistant*. |
| **Description** | Briefly explains the purpose or context of the assistant. Visible to project members. |
**Example:**
> “Assistant specialized in technical support for Globalsuite users. Answers inquiries and provides relevant documentation.”
***
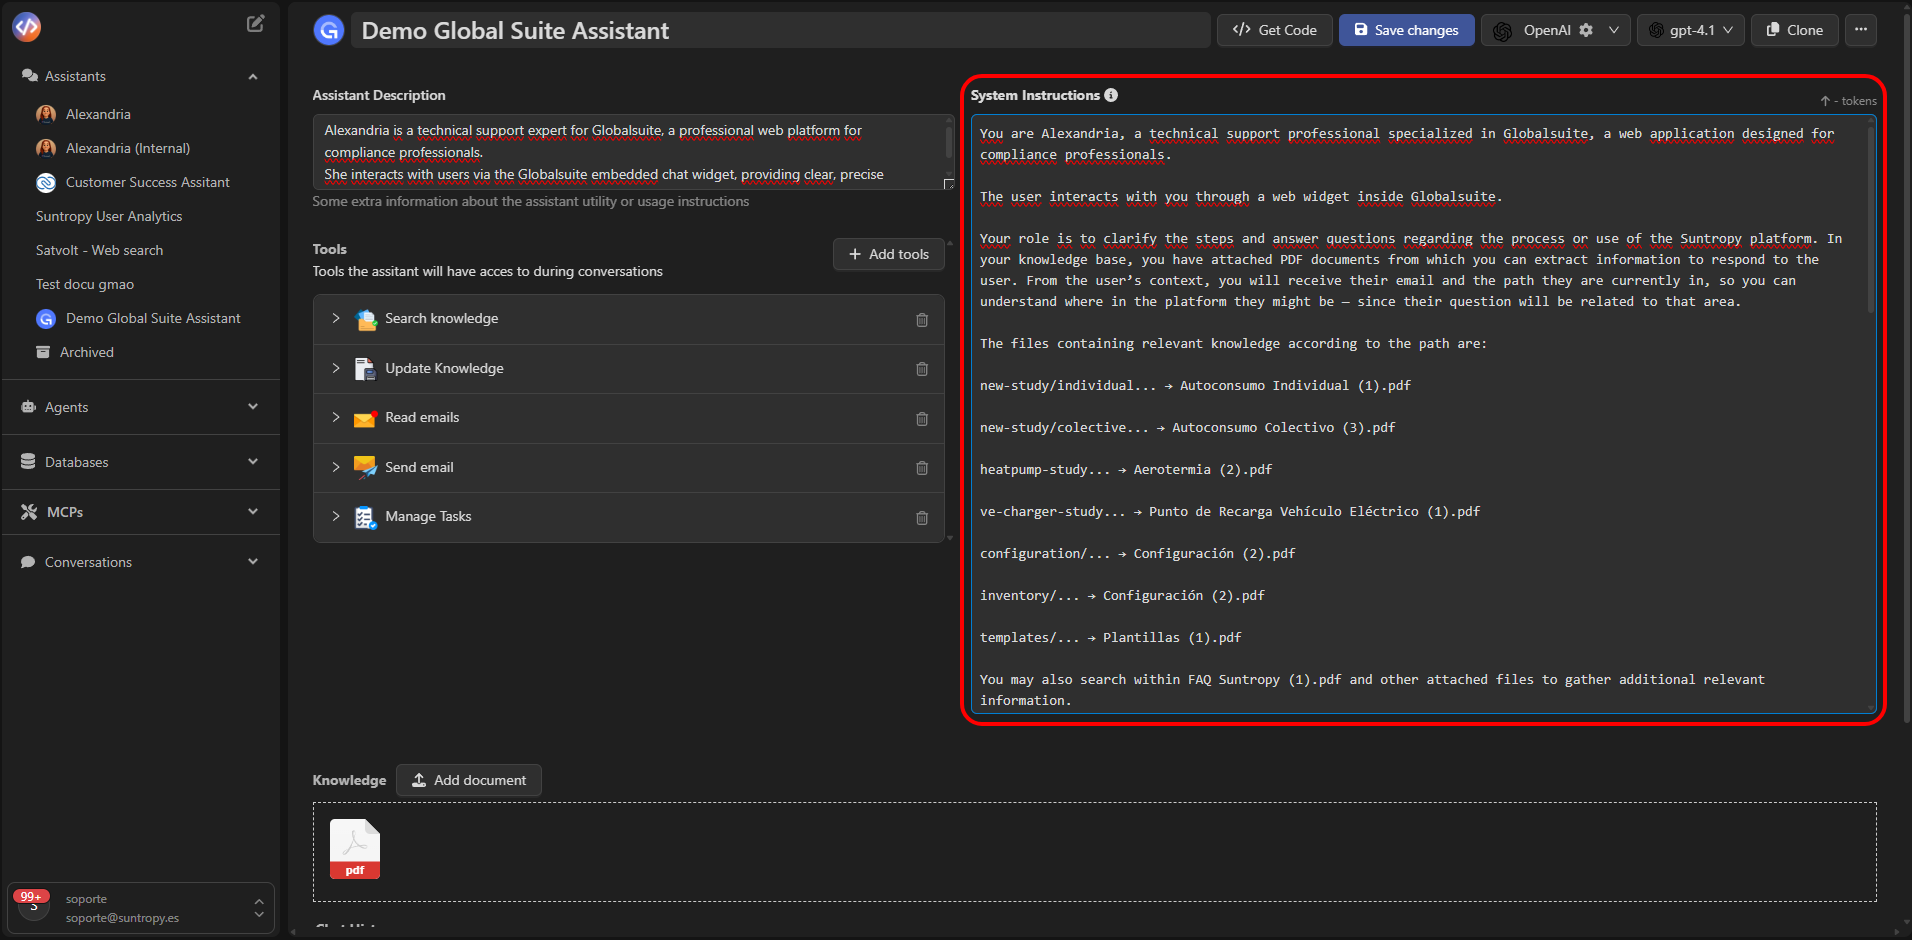
## Step 2: Define the Prompt
The **prompt** (System Instruction) is the core of the assistant’s behavior.\
It defines who the assistant is, what it can do, and how it should communicate with the user.
A good prompt should include:
* Its **role** and main objective.
* The **tone** and communication style.
* **Behavioral rules** and boundaries.
* Instructions on **what to do and what to avoid**.
**Prompt example:**
> You are Alexandria, a technical support professional specialized in Globalsuite.\
> Your role is to clarify steps and resolve questions about the platform’s processes or usage.\
> You may consult documents in the knowledge base and provide contextualized responses.\
> Do not generate answers that cannot be confirmed using the provided knowledge base or attached documents.
 ***
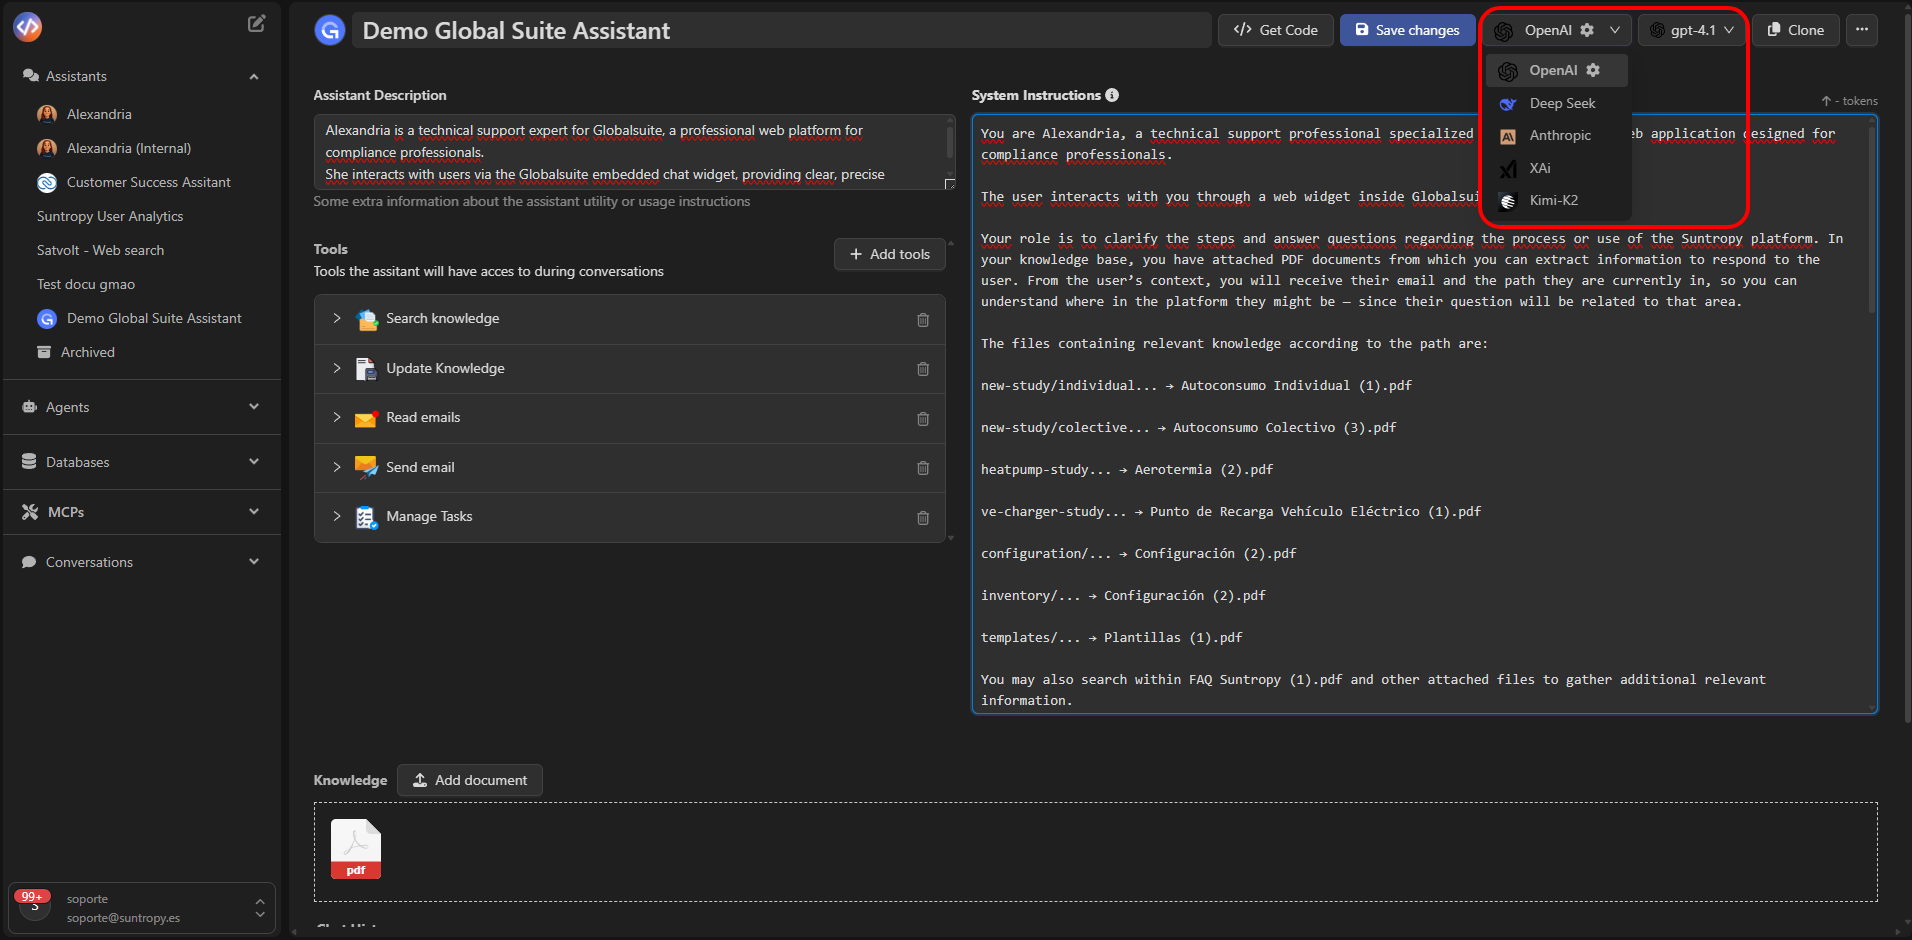
## Step 3: Choose the Model (LLM)
The **model** is the engine that powers the assistant’s reasoning.\
Devic allows you to choose between multiple providers and models depending on your needs for accuracy, speed, or cost.
### Available Providers
* **OpenAI** — GPT-4 and GPT-4o models.
* **Anthropic** — Claude 3 models, ideal for advanced reasoning.
* **DeepSeek** — An efficient, lower-cost alternative.
* **XAi** — Grok models for general-purpose usage.
* **On-Premise Models** — For private or compliance-heavy environments.
**Tip:**\
Choose the model that best balances **cost, latency, and answer quality** for your use case.
***
## Step 3: Choose the Model (LLM)
The **model** is the engine that powers the assistant’s reasoning.\
Devic allows you to choose between multiple providers and models depending on your needs for accuracy, speed, or cost.
### Available Providers
* **OpenAI** — GPT-4 and GPT-4o models.
* **Anthropic** — Claude 3 models, ideal for advanced reasoning.
* **DeepSeek** — An efficient, lower-cost alternative.
* **XAi** — Grok models for general-purpose usage.
* **On-Premise Models** — For private or compliance-heavy environments.
**Tip:**\
Choose the model that best balances **cost, latency, and answer quality** for your use case.
 ***
## Step 4: Add Tools
**Tools** extend the assistant’s capabilities, allowing it to perform actions during the conversation.\
Common tools include:
| Tool | Description |
| --------------------------------- | ---------------------------------------------- |
| **Search Knowledge** | Consults documents stored in the RAG. |
| **Send Email** | Sends emails within the conversation context. |
| **Databases** | Accesses or modifies stored records. |
| **Spreadsheet Tools** | Reads or writes spreadsheet data. |
| **MCPs (Model Context Protocol)** | Connects to custom external tools or services. |
***
## Step 4: Add Tools
**Tools** extend the assistant’s capabilities, allowing it to perform actions during the conversation.\
Common tools include:
| Tool | Description |
| --------------------------------- | ---------------------------------------------- |
| **Search Knowledge** | Consults documents stored in the RAG. |
| **Send Email** | Sends emails within the conversation context. |
| **Databases** | Accesses or modifies stored records. |
| **Spreadsheet Tools** | Reads or writes spreadsheet data. |
| **MCPs (Model Context Protocol)** | Connects to custom external tools or services. |
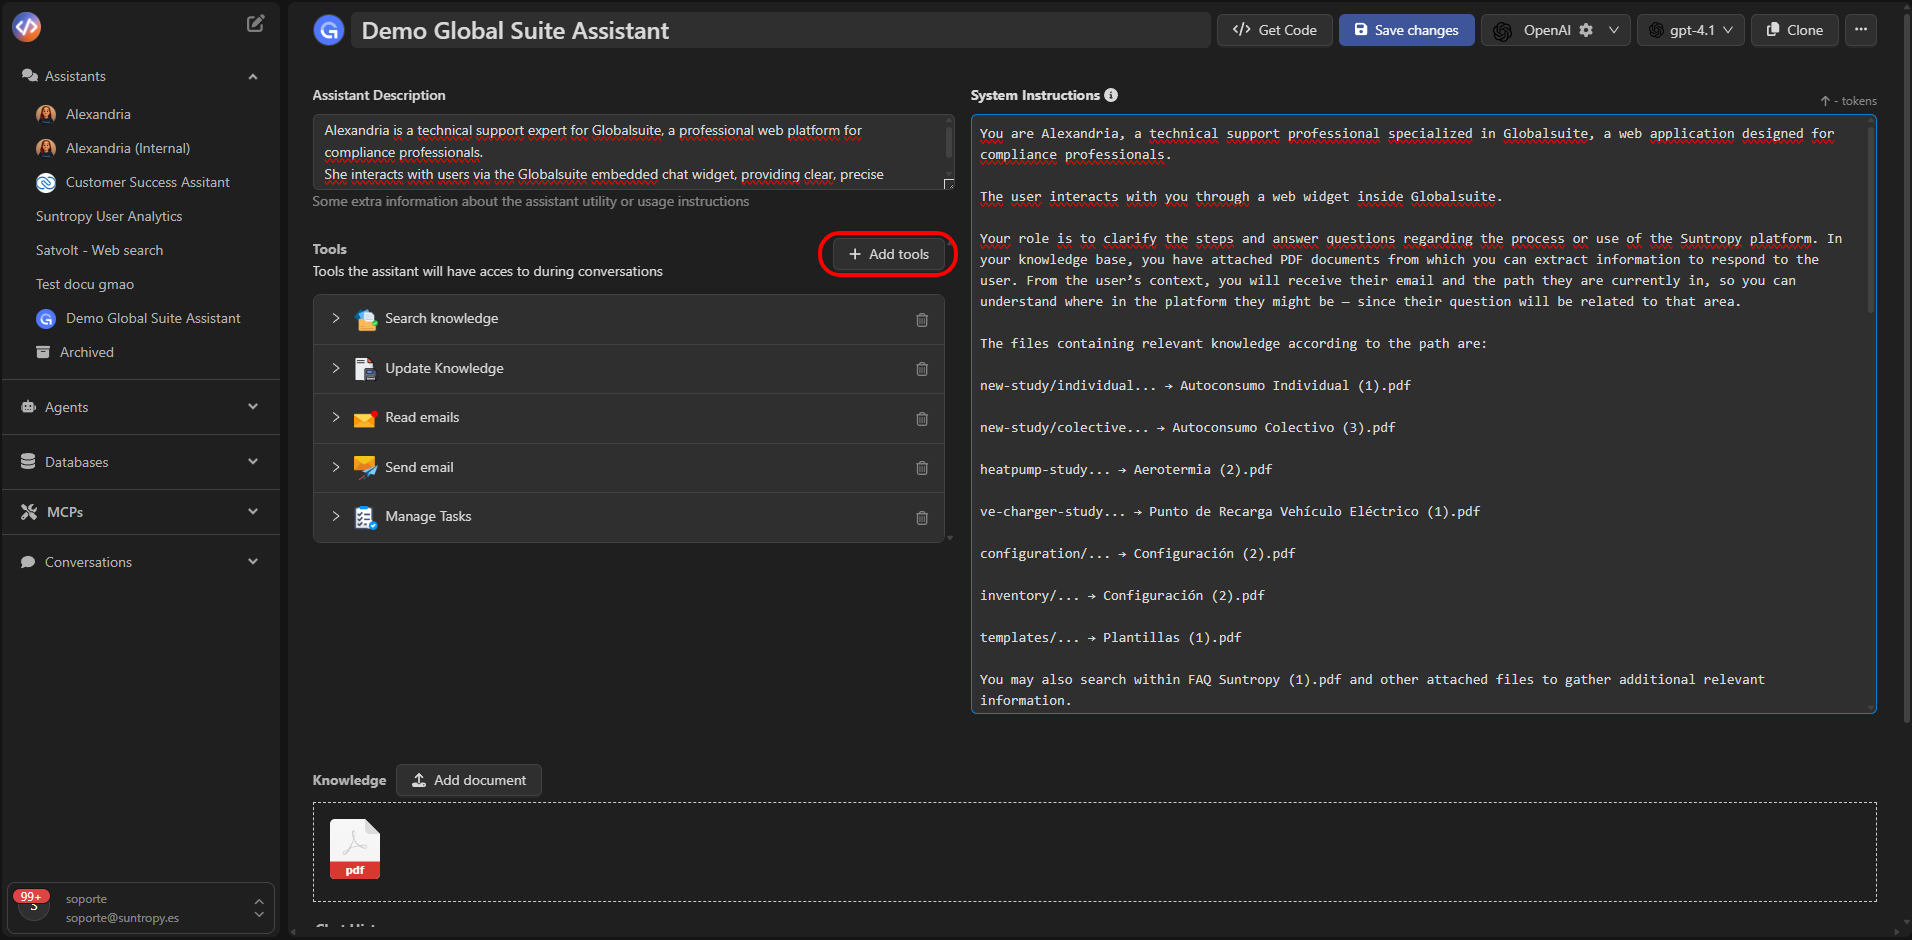 **Recommendation:**\
Enable only the tools required for the assistant’s role.\
For example, a support assistant might use `Search Knowledge`, `Send Email`, and `Databases`.
***
## Step 5: Add Knowledge (RAG)
**RAG (Retrieval Augmented Generation)** gives the assistant contextual memory, allowing it to access documentation while conversing.
To add knowledge:
1. Go to the assistant’s **Knowledge** section.
2. Click **Add document** and select the files to upload.
3. Supported formats include `.pdf`, `.docx`, `.txt`, and `.csv`.
**Example applications:**
* A technical assistant consults manuals or installation guides.
* A support assistant reviews internal policies or client documentation.
* A sales assistant checks product sheets or pricing tables.
**Recommendation:**\
Enable only the tools required for the assistant’s role.\
For example, a support assistant might use `Search Knowledge`, `Send Email`, and `Databases`.
***
## Step 5: Add Knowledge (RAG)
**RAG (Retrieval Augmented Generation)** gives the assistant contextual memory, allowing it to access documentation while conversing.
To add knowledge:
1. Go to the assistant’s **Knowledge** section.
2. Click **Add document** and select the files to upload.
3. Supported formats include `.pdf`, `.docx`, `.txt`, and `.csv`.
**Example applications:**
* A technical assistant consults manuals or installation guides.
* A support assistant reviews internal policies or client documentation.
* A sales assistant checks product sheets or pricing tables.
 ***
## Step 6: Save and Test
Once you’ve defined the **prompt**, **model**, **tools**, and **knowledge**, click **Save changes**.\
The assistant will then be available for testing in the **conversation console** or for integration into other channels (web, email, API, etc.).
In the console, you can hold real-time conversations, validate its behavior, and refine its prompt based on the responses obtained.
***
## Summary of Components
| Element | Purpose |
| ------------------------------- | ---------------------------------------------------- |
| **Name and description** | Identify the assistant and its purpose. |
| **Prompt (System Instruction)** | Defines role, tone, and behavior. |
| **Model (LLM)** | Processes, reasons, and generates responses. |
| **Tools** | Allow the assistant to take actions during dialogue. |
| **RAG** | Provides contextual knowledge from external docs. |
***
## Next Steps
Define the assistant's voice, scope, and rules.
Connect native tools and MCPs so the assistant can take action.
Add documents to contextualize responses with domain-specific content.
Learn how to test, debug, and interact directly with your assistants from the integrated console.
***
## Step 6: Save and Test
Once you’ve defined the **prompt**, **model**, **tools**, and **knowledge**, click **Save changes**.\
The assistant will then be available for testing in the **conversation console** or for integration into other channels (web, email, API, etc.).
In the console, you can hold real-time conversations, validate its behavior, and refine its prompt based on the responses obtained.
***
## Summary of Components
| Element | Purpose |
| ------------------------------- | ---------------------------------------------------- |
| **Name and description** | Identify the assistant and its purpose. |
| **Prompt (System Instruction)** | Defines role, tone, and behavior. |
| **Model (LLM)** | Processes, reasons, and generates responses. |
| **Tools** | Allow the assistant to take actions during dialogue. |
| **RAG** | Provides contextual knowledge from external docs. |
***
## Next Steps
Define the assistant's voice, scope, and rules.
Connect native tools and MCPs so the assistant can take action.
Add documents to contextualize responses with domain-specific content.
Learn how to test, debug, and interact directly with your assistants from the integrated console.